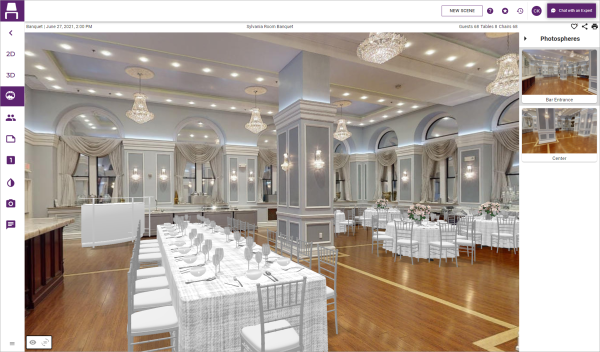
Setting Up Photosphere for a Place
After you have acquired your 360-degree photosphere image, you can upload it into Placez and set it up for use with your floor plan. Then you must align the boundaries of your floor plan with the fixed objects (walls, doors, etc.) of the photosphere image so Placez will know where tables, chairs and other objects can be placed. Finally, any fixed objects in the room might need to be "masked" so that tables or other objects placed behind them are appropriately blocked from view when guests scan the photosphere image.
- Click or tap the Place Library sidebar option
 on the left-hand side of your screen to see your list of venues, and tap the arrow button
  at the right of a "place" or venue to open it.
Result: The Place Details window opens for the selected place.
Note: SeeAdding a New Place for information about creating a new place in the Place Library. - In the Floorplans panel at the bottom left, click the name of the floor plan to which you want to add the photosphere image.
Result: The selected floor plan opens in Floor Plan Mode.
Note: See Creating Your Floor Plan for information about creating custom floor plans.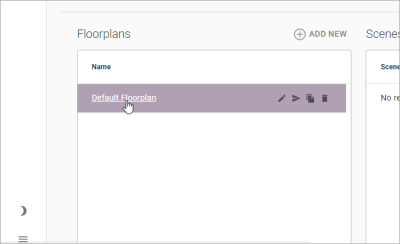
- Click/tap the Photosphere button
 in the sidebar on the left of the screen.
Note: The Photospheres panel appears along the right side of the screen. - Click/tap the Add Photosphere button at the bottom right of the screen.
Result: The Import Floorplan Image window appears.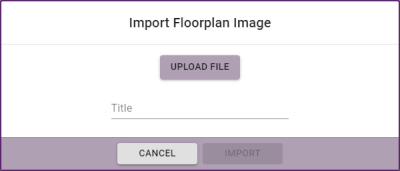
- Click/tap the Upload File button.
Result: A browse window appears for you to browse to the photosphere file. - Browse to the file you want to upload and click/tap Open.
Result: The file is uploaded into the Import Floorplan Image window. - Enter a Title for the image and click/tap Import.
Result: The image and its title appears in the Photospheres panel on the right side of the screen.
Note: If uploading multiple images, the title should describe the angle of each shot - for example, "Center of Room", "From East Entrance", etc. - Repeat Steps 4-7 to import other photosphere images if desired.
-
After uploading one or more photosphere images (see topic above), click/tap the first photosphere image in the Photospheres panel on the right side of the screen and drag it on top of the floor plan and release it.
Result: Nothing appears to happen onscreen. -
Click/tap the photosphere image again in the Photospheres panel on the right side of the screen.
Result: The main floor plan area of the screen now shows the photosphere image and the boundaries of the floor plan appear as gray lines toward the bottom of the image.
Note: You must tap the image a second time after dragging and dropping it to see it on the floor plan. -
Arrange the gray floor plan boundary (the lines visible at the bottom of the image that represent the floor plan you traced for this space) so that it is properly aligned with the walls and other fixed objects in the photosphere image using the options below located in the toolbar at the top left of the screen:
Note: This step is extremely important so that Placez knows where it is allowed to place tables, chairs and other objects within your photosphere layouts.-
 Rotate Camera
Click/tap this button and drag the photosphere image in any direction (360-degrees) to reposition it based on the camera angle.
Note: You can optionally adjust the height of the camera using the small "plus" and "minus" signs under the photosphere image on the right side of the screen. -
 Move Floor
Click/tap this button and drag the gray outline of the floor to place it in the correct position relative to the photosphere image. -
 Rotate Floor
Click/tap this button and drag the gray outline of the floor to rotate it as opposed to moving it from side to side. -
 Camera Height
Located under each photosphere image on the right side of the screen, this option lets you click/tap the minus or plus sign to lower or raise the height of the camera (respectively), thus raising or lowering the floor height relative to your photosphere image.
-
-
Repeat Steps 1-3 above to align the floor plan on other photosphere images.
-
With your "place" open in Floor Plan Mode (see Steps 1 & 2 under "Uploading the Photosphere Image, above), click/tap the Switch to 2D button
 in the sidebar along the left side of the screen.
Result: Your floor plan is displayed in 2D mode. -
Click/tap the Edit button
 at the top left of the screen.
 -
At the bottom left of the screen, click/tap the View button
 and in the pop-up list of buttons that appears click/tap the Floorplan Image
  button.
Result: The floor plan image for this space is now visible through the floor of the 2D display. - In the Fixtures panel along the right side of the screen, verify that the Fixtureslibrary is selected.
Note: If a different library is selected, click/tap the "plus" sign to the right of the library name and select the Fixtures library. - Under the Fixtures library title on the right side of the screen, click/tap the down arrow and choose the category Architecture.
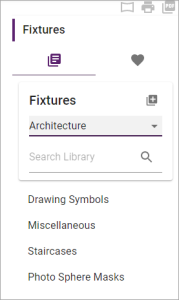
- Below the Architecture category you just selected, click/tap the sub-category of Photo Sphere Masks.
- Based on the shape of the fixed object you want to mask, choose either the Square Mask or Round Mask in the Fixtures panel on the right side of the screen and drag it and drop it into position on your floor plan.
Result: The mask is placed in position, and the panel along the right side of the screen allows you to edit the mask dimensions. - In the panel along the right side of the screen, edit mask dimensions (width, depth, height) so that it appropriately masks the object in the floor plan.
Note:You might need to drag the mask or nudge with your arrow keys to position it correctly, or rotate it by dragging the purple arrow that surrounds it.
Important Note: Don't forget to apply the appropriate Height to the mask so that it will appropriately cover the object.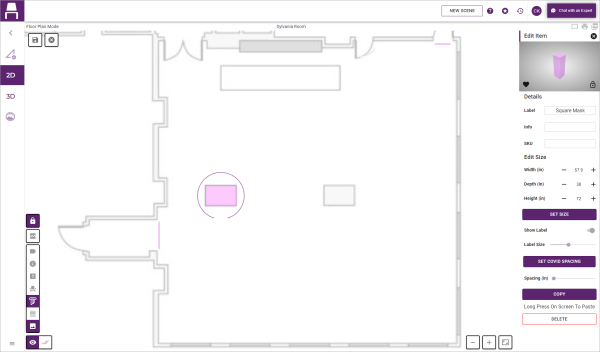
- Repeat Steps 7 & 8 to place masks on other fixed objects in the space.
Note: Some objects might require more than one mask. In the image below, a fixed bar is masked by one square (rectangular) mask for the base of the bar and another larger one for the bar top.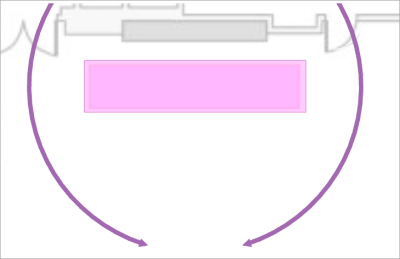
- When finished, click the Save button
 at the top left of the screen to save your changes.
 - Click the Photosphere button
 in the sidebar on the left side of the screen to preview the masks you have added.
Note: If masks do not match up with fixed objects in photosphere, you can go back to 2D mode and repeat Step 8 above to adjust them.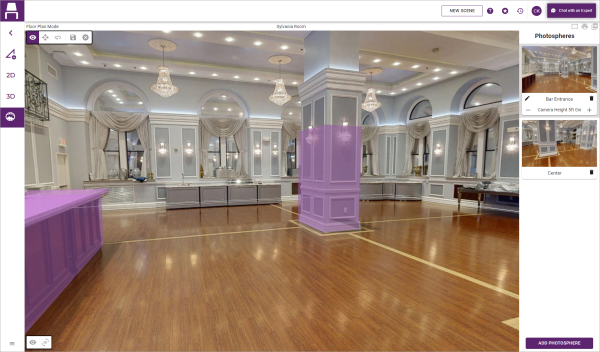
Tip: When layouts are viewed in Photosphere (as shown below), objects behind the masks will be obscured from view as they should be.
